Workshop Hands-On #2
Algorithms
Building, exporting and uploading algorithm images to Grand Challenge
🚀 In this hands-on session, you will get to know the Algorithm feature on Grand Challenge. You will create an algorithm, build, export and upload an algorithm image to that algorithm, and try it out.
⚠️ Note that you will not yet submit the algorithm to your challenge in this hands-on. That will happen during hands-on #3.
✅ In order to complete the tasks below, you need to have a verified account on Grand Challenge and a working Docker environment. We expect you have both of these already, if not, check the prerequisites page.
This hands-on will require you to do some debugging. Make sure to work closely with your team and troubleshoot any issues as you progress through the steps! If you encounter any problems and are having a hard time figuring things out as a team, don’t hesitate to ask for help from the workshop hosts.
1. Clone the workshop demo algorithm
If you haven't done so yet, pull the workshop GitHub repository containing a demo algorithm to a folder on your computer:
git clone https://github.com/DIAGNijmegen/rse-workshop-challenge-masterclass.git
This will create a rse-workshop-challenge-masterclass/ folder in your current working directory.
2. Build and save the docker image
Assuming you are in the main rse-workshop-challenge-masterclass/ folder, navigate to the algorithm's subfolder:
cd algorithms
We have provided a ready-to-build algorithm for you. As a first step, test that the image builds and runs without errors locally:
./test_run.sh
This should build the image and subsequently execute it as a container image. When running the algorithm locally, it sources the fixed inputs from test/input/. When run on Grand Challenge, the files under input/ will differ. For each algorithm run, they will correspond to one of the archive items you created in hands-on #1.
If the test run succeeds, build and export the image by running:
./save.sh
3. Create an algorithm on Grand Challenge
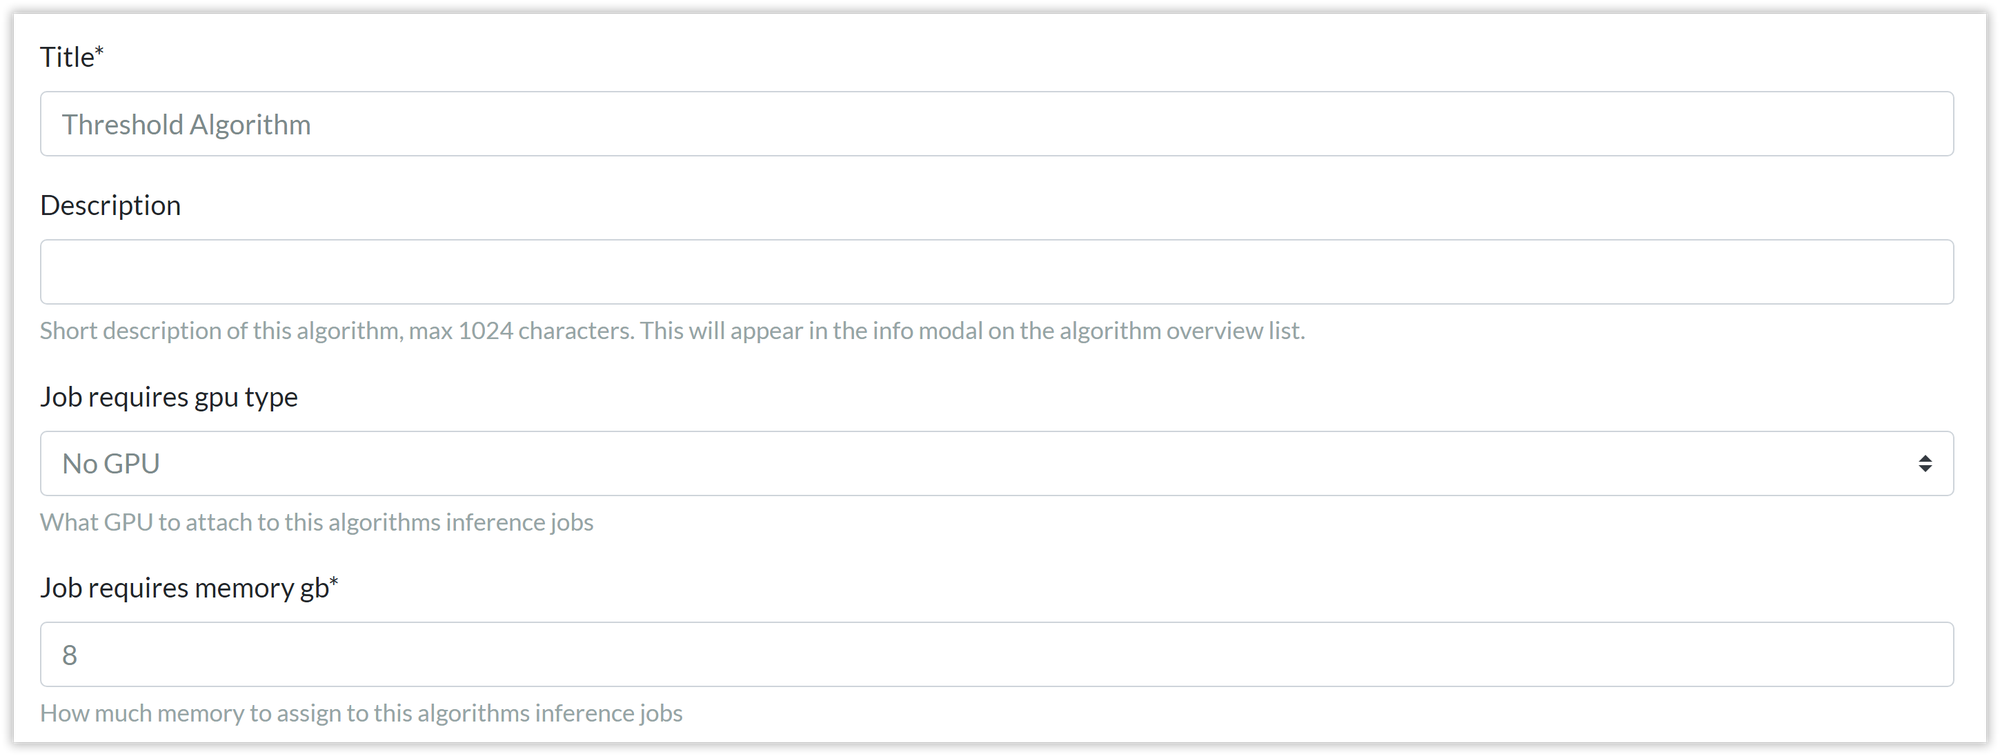
While the image is building (it should only take a minute), go to the Submit tab of your challenge. This is where you and your challenge participants will find a link to create an algorithm for the challenge. In this tutorial, we won't submit the algorithm to the challenge yet, but rather create and test the algorithm in isolation. So ignore the warnings at the top of the page (we will address these in hands-on #3) and scroll down and click on Manage your algorithmsto create an algorithm:
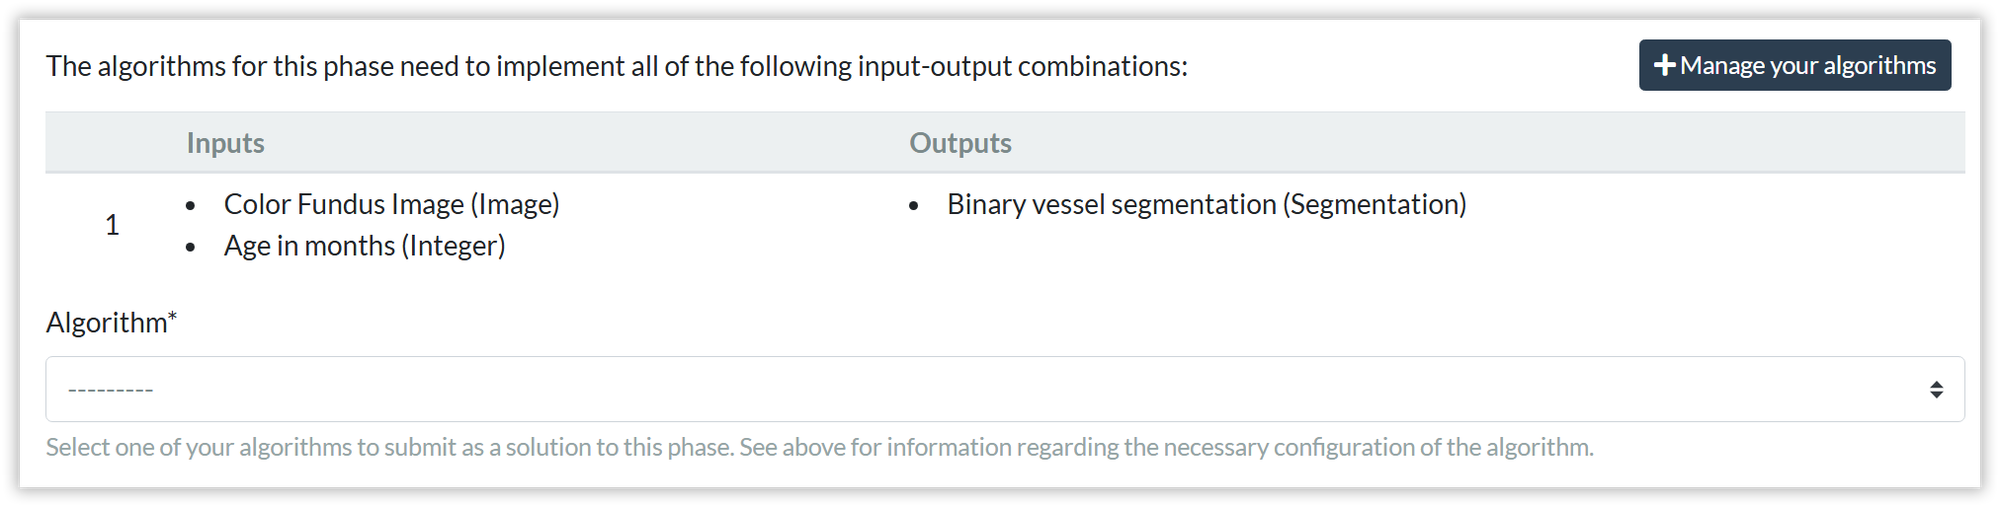
This will open a form that will ask you to give your algorithm a name and configure its resources. In this form, please stick to the defaults: no GPU and 8 GB of memory.
4. Upload the exported image to your algorithm
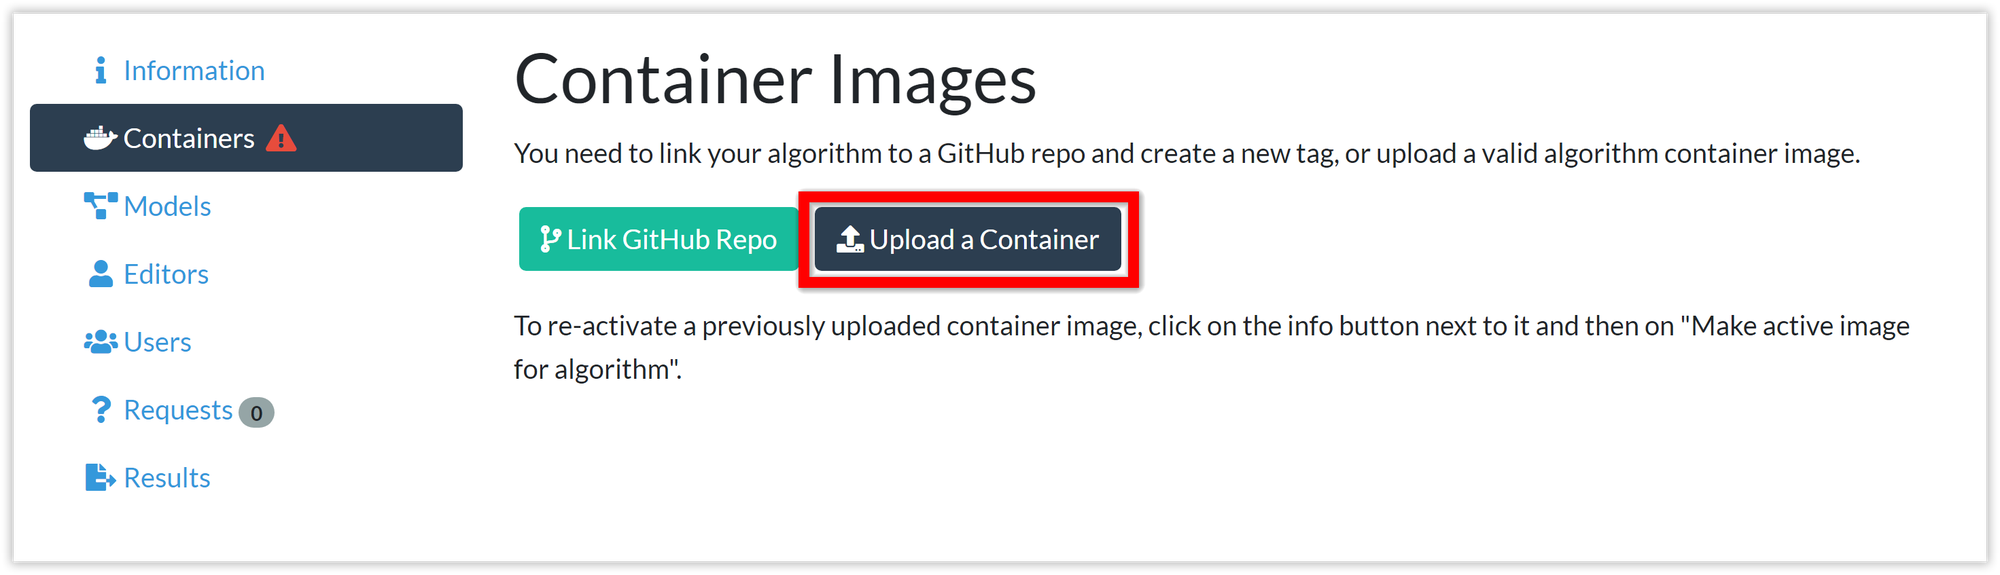
After you submit the above form, you will be redirected to your algorithm's page, specifically the container tab. Upload the Docker image that you exported locally by clicking on Upload a Container.
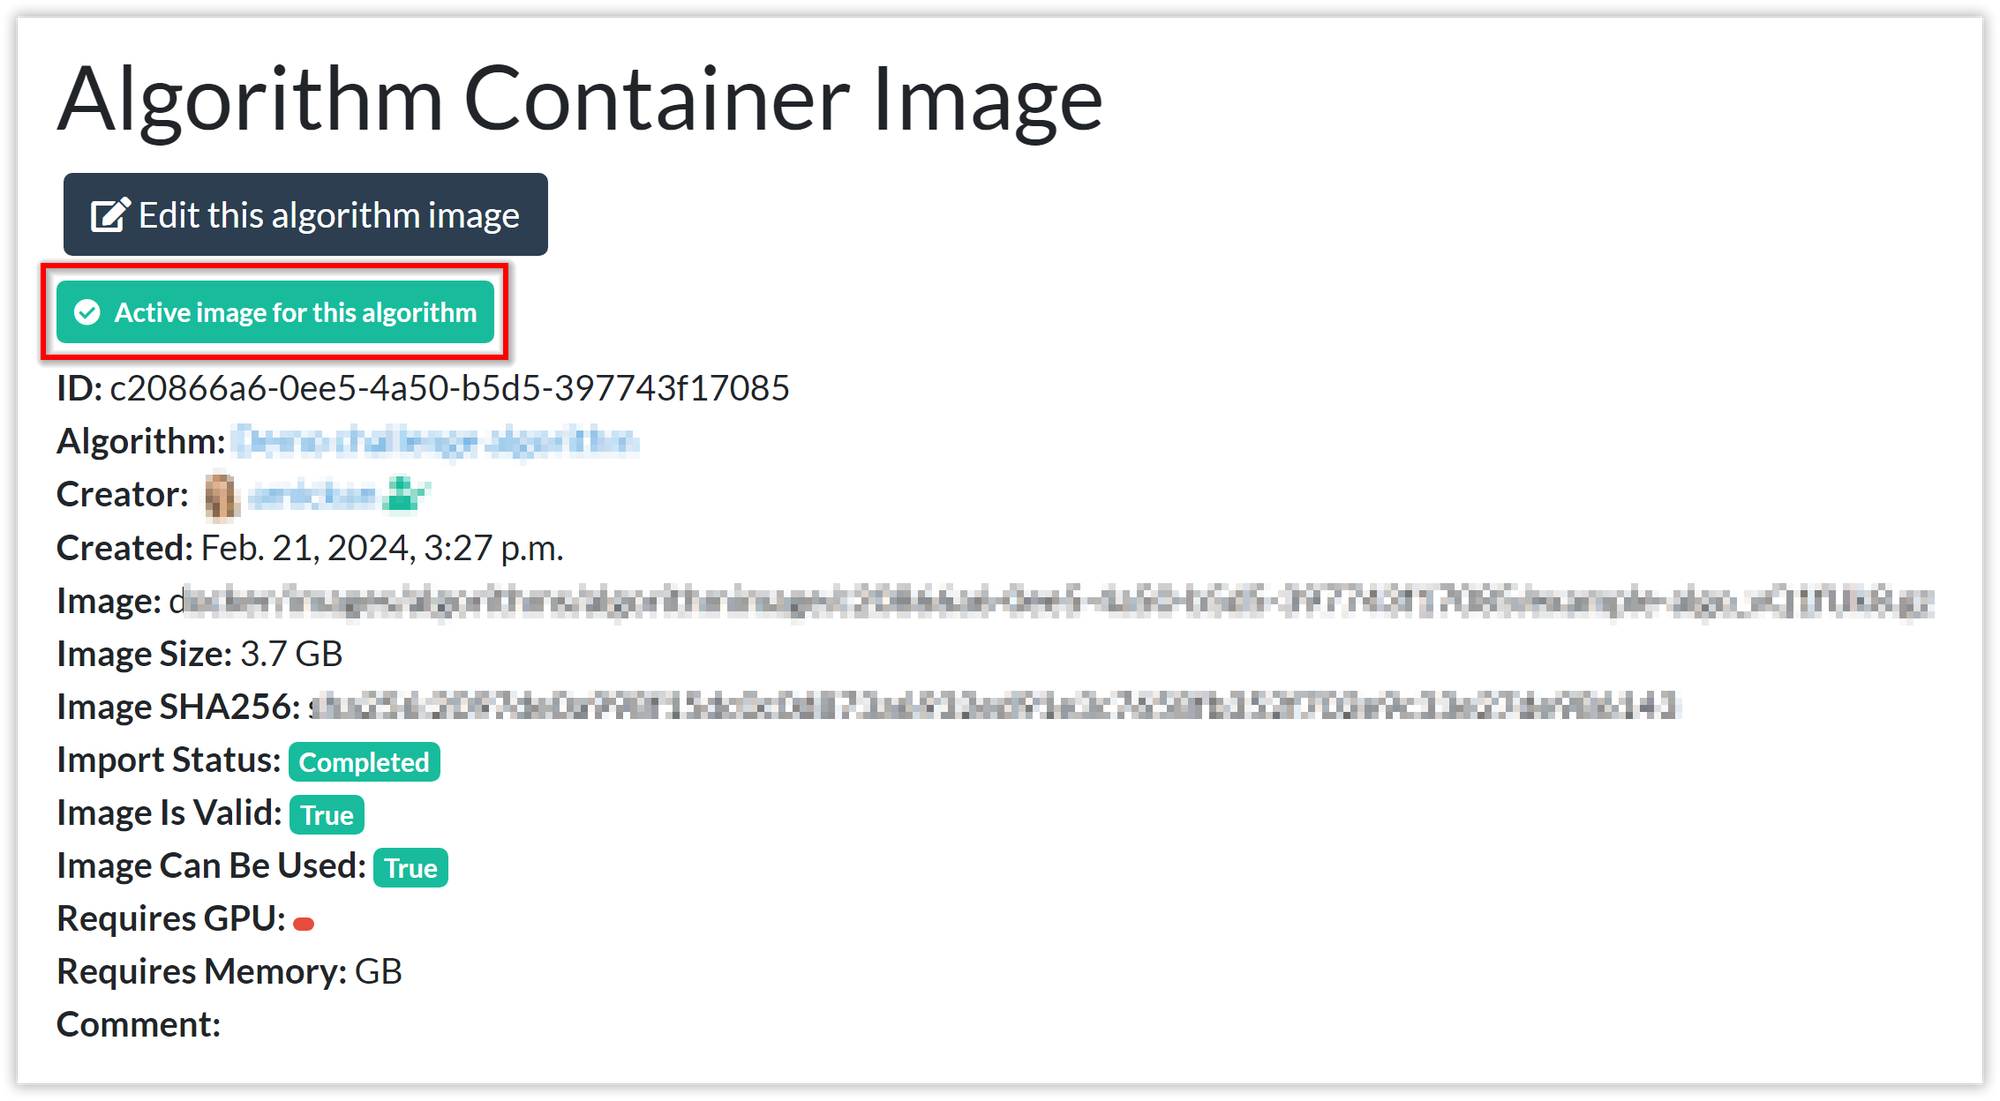
Drag and drop your algorithm image and wait for Grand Challenge to import it. Grand Challenge checks that your image is a valid docker image. This validation can take some time. Make sure you refresh the page occasionally to see the updated status. Once your image is ready to be used, it will be marked as Active image for this algorithm.
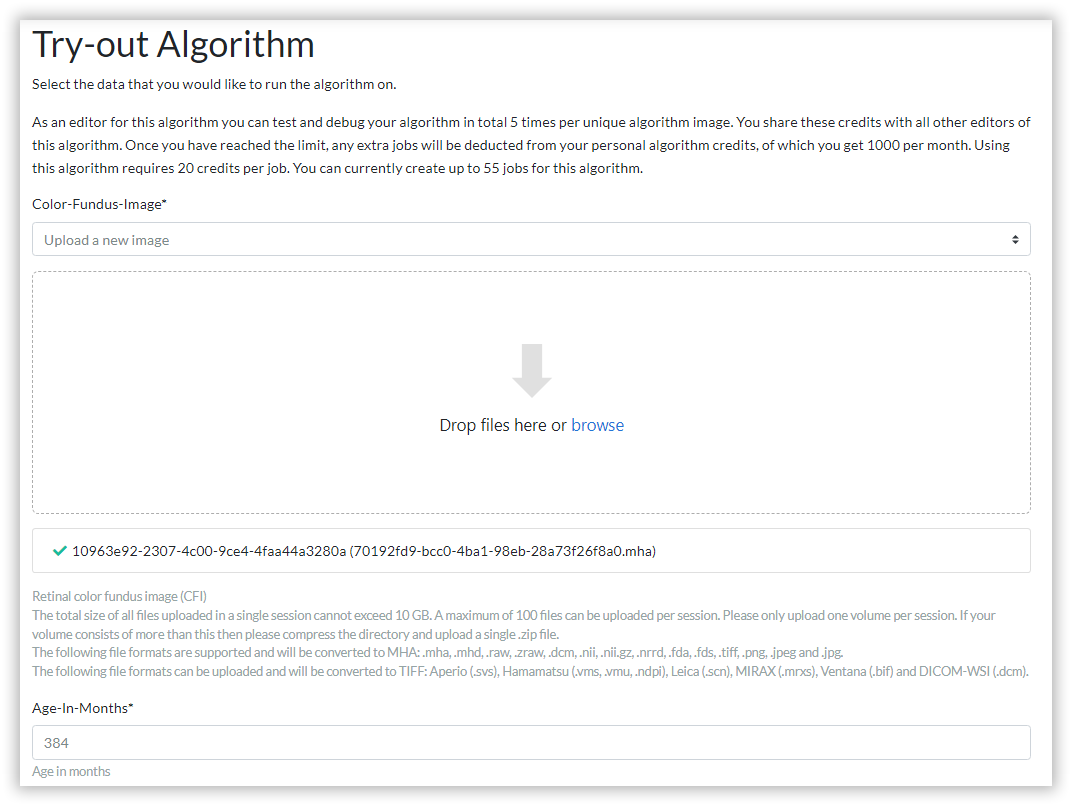
5. Try out the algorithm
Once the image is active and ready to be used, you will see the Try-out algorithm tab in the sidebar. Use this to test the algorithm on one of the example images that we provided to you.
For the colour fundus image, select Upload a new image and drag and drop one of the images from the previous hands-on. For age in months, enter your own age (or some other number, it doesn't really matter for this demo).
Note that it might take some time to import the image and start the algorithm job. Again, make sure to refresh the page occasionally to see the most up-to-date status.
6. Inspect the algorithm result
Ooops, it looks like something went wrong!
Your algorithm run failed even though it succeeded locally. Why is that? All algorithm outputs on Grand Challenge are validated to check that they conform to what has been defined for the output interface. This check doesn't happen locally.
Inspect the error message and figure out what went wrong.
- Go back to the code in
inference.pyand fix the issue - Rebuild and export the image (see step 2)
- Upload the updated image to your algorithm (see step 4). When you upload a new image, this image will automatically become the active image for your algorithm if it passes validation. So just upload the new image and wait for the import to complete. Verify that you see Active image for this algorithm before continuing.
- Test the algorithm out again (see step 5)
Hopefully this time, the algorithm job succeeds. If not, repeat the process until it does.
7. Inspect the successful algorithm result
Once you have a successful algorithm result, check it out in Grand Challenge's built-in web viewer. If you are already on the result's detail page, simply click Open Result in Viewer
Alternatively, if you navigated away from the result's detail page in the meantime, go to the "Results" tab and unfold the row for the successful result by clicking on the plus icon; and then click
Bonus
You will probably find that the algorithm doesn't do a particularly good job at segmenting vessels. If time allows, can you improve the threshold algorithm?
Clean-up
When you are done with this tutorial, feel free to delete the created algorithm images (i.e. the tar.gz files) from your local machine. For this workshop, the images are small, but you won't need them any more and can anyway rebuild them at any time, so it is good practice to clean up unneeded resources.